Cypress Installation Ultimate Guide: Your First Tests with JavaScript
If you’re looking for a robust, developer-friendly tool to perform end-to-end testing for your web applications, Cypress is a fantastic choice. It’s fast, reliable, and works seamlessly with modern JavaScript frameworks. This blog will walk you through everything from installing Cypress to writing and running your first tests. By the end, you’ll have a solid foundation to incorporate Cypress into your testing toolkit. I will share my experience with Cypress and Javascript and what to pay attention to when it comes to Cypress installation. In case you are just about to start with Cypress let first explain first the basics.
What is Cypress?
Cypress is a next-generation testing framework that allows developers to write and execute tests directly in the browser. Unlike traditional testing tools, Cypress operates within the same run-loop as your application, providing faster and more accurate results. Here are a few key benefits of Cypress:
- Real-time reloading: Automatically updates tests as you make changes.
- Built-in waiting: No need to write manual waits or timeouts.
- Snapshot debugging: See exactly what went wrong in your application.
- Full-stack testing: Covers end-to-end, integration, and unit testing.
With these capabilities, Cypress has one of the fastest growing audiences in the world. Its ease of use and setup seems to be very appealing to new QA engineers.
Cypress Installation: Step-by-Step Guide
Before you start with writing tests, you need to setup Cypress on your machine.
1. Prerequisites
Before you begin, make sure you have the following:
- Node.js: Cypress requires Node.js. You can download it from Node.js official site.
- npm or Yarn: A package manager to install Cypress. Both npm (comes with Node.js and it is preferred for newbies) and Yarn work.
- A Code Editor: Visual Studio Code is highly recommended.
2. Initialize Your Project
First step is to create a new folder on your computer where you will store the project you will create later. When you first run your Visual Studio Code open this folder by clicking at the top toolbar on File > Open Folder. When you open this folder a terminal window should open at the bottom part of the screen. If it doesn’t open it yourself from the top toolbar of VS Code. In terminal type the following:
npm initYou will be asked a series of questions in terminal window. You can just hit enter for all of them. This command generates a package.json file, which will manage your project dependencies.
3. Cypress installation
To install Cypress, run the following command:
npm install cypress --save-devThis installs Cypress as a development dependency. The --sav-dev portion of the command will create this dependency as a development dependency. This means in general that your project could work without Cypress installed. This would also mean that if someone installs your package they will not install Cypress. This command makes more sense if you are using Cypress for unit or component testing and you are installing it in the same project where the system under test is.
4. Open Cypress
After installation, you can open Cypress for the first time using:
npx cypress openThis command launches the Cypress Test Runner in new browser window and creates a default cypress folder in your project. The folder contains the following subdirectories:
- fixtures: Stores test data.
- integration: Stores test files.
- plugins: Customizes and extends Cypress behavior.
- support: Houses reusable commands and configuration settings.
This concludes Cypress installation.
This action might take a while and when the page opens you will see two options to choose from: E2E testing and Component testing.
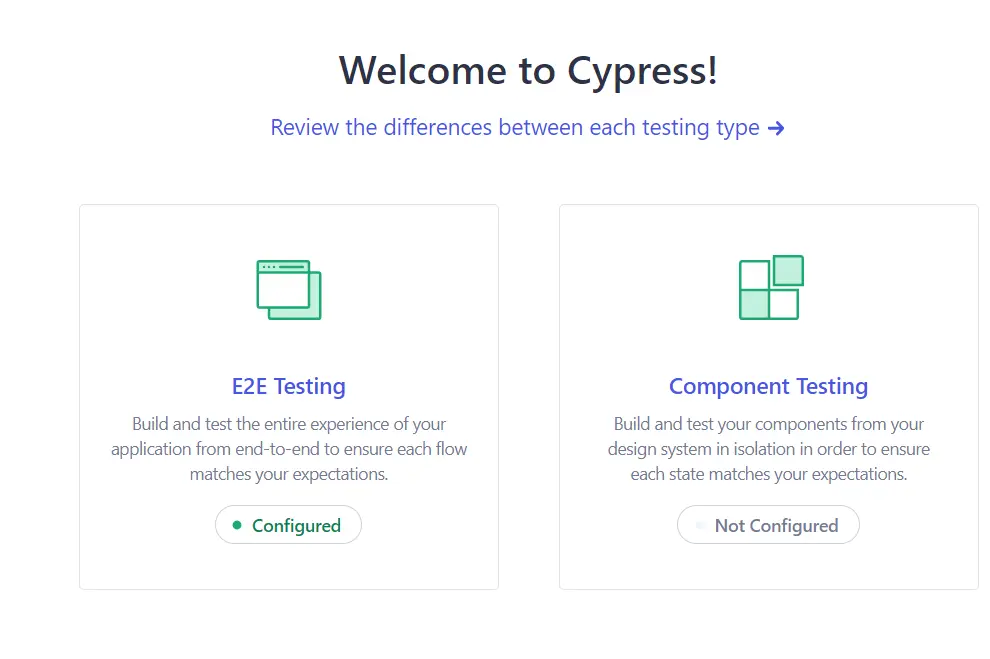
As a QA engineer who is a beginner in testing you should choose E2E option. On the next screen click Continue button and the configuration will start.
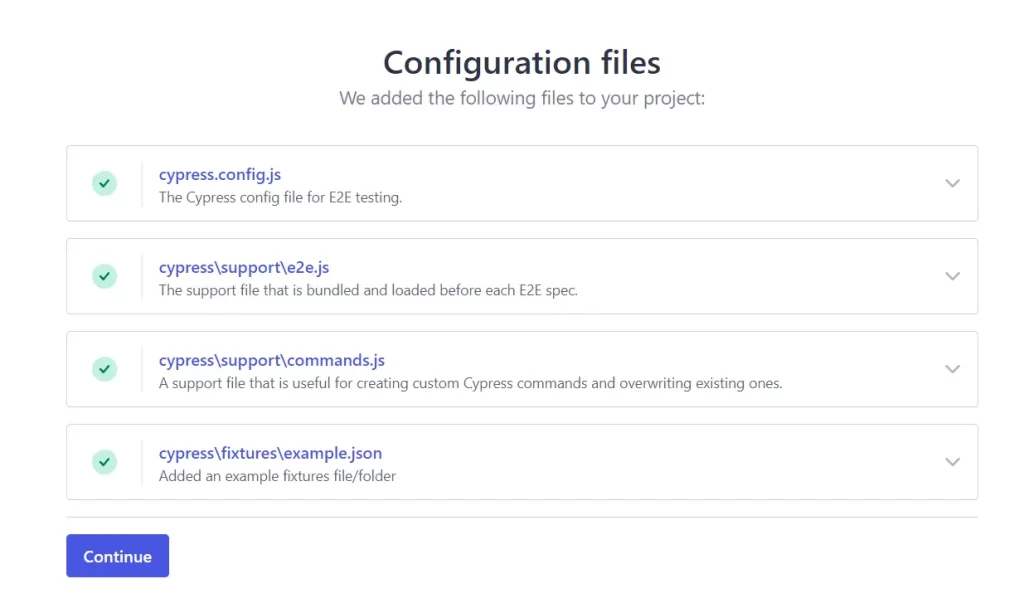
In the next step you should select the browser you wish to use in your tests (only browsers installed on your computer will appear + Electron which comes with Cypress installation). Click Start E2E testing after you select the browser. On the next screen Cypress offers to create a sample specifications with tests for you as an example. In each of these example specifications you can see the best practice for usage of different methods in Cypress.
Writing Your First Test in Cypress
Now that Cypress is set up, it’s time to write your first test. For this example, we’ll test a simple sign up page on https://demo.applitools.com/.
1. Create a New Test File
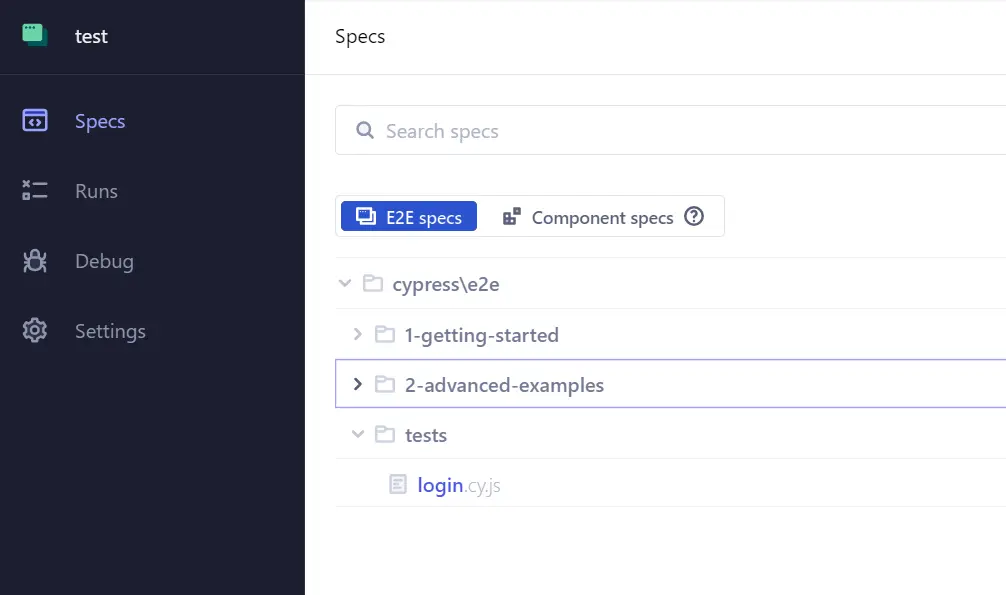
Inside the cypress/e2e folder, create a new folder called tests and in it new file named login.cy.js. Cypress uses the .cy.js extension for test files.
2. Writing the Test
For writing tests you will need a basic understanding of CSS selectors. You can find an in depth tutorial in this blog post. Here’s how to write a basic test:
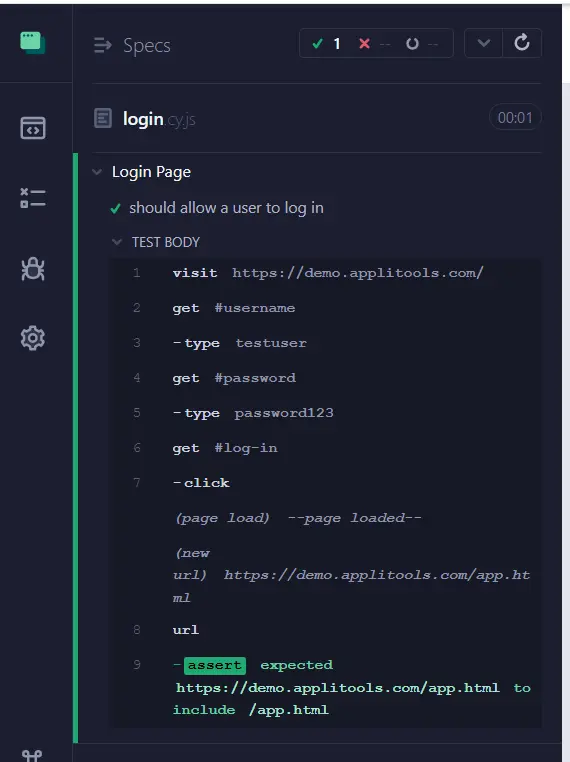
describe('Login Page', () => {
  it('should allow a user to log in', () => {
    // Visit the login page
    cy.visit('https://demo.applitools.com/');

    // Fill in the username and password
    cy.get('#username').type('testuser');
    cy.get('#password').type('password123');

    // Click sign in
    cy.get('#log-in').click();

    // Assert the user is redirected to the dashboard
    cy.url().should('include', '/app.html');
  });
});
Let’s break this down:
describe: Groups related tests together.it: Defines an individual test.cy.visit: Navigates to a specified URL.cy.get: Selects an element on the page..type: Simulates typing into an input field..click: Simulates a button click..should: Makes assertions about the application state.
3. Run the Test
To run the test, open the Cypress Test Runner (npx cypress open) and click on login.cy.js.
Cypress will execute the test and display the results in real-time in Cypress Test Runner.
Best Practices for Writing Cypress Tests
To ensure your tests are maintainable and reliable, follow these best practices and we will certainly follow them and explain them in more detail in next tutorials:
1. Use Selectors Wisely
Avoid using CSS classes or IDs that are likely to change. Instead, add unique data-* attributes to your elements for testing purposes. For example:
<button data-testid="submit-button">Submit</button>Then, use Cypress to select the element:
cy.get('[data-testid="submit-button"]').click();2. Leverage Custom Commands
If you find yourself repeating the same steps in multiple tests, create a custom command. Add the command in cypress/support/commands.js:
Cypress.Commands.add('login', (username, password) => {
  cy.visit('/login');
  cy.get('input[name="username"]').type(username);
  cy.get('input[name="password"]').type(password);
  cy.get('button[type="submit"]').click();
});
Then use it in your tests:
cy.login('testuser', 'password123');3. Clean Up Between Tests
Ensure each test starts with a clean slate. Use beforeEach to reset the application state:
beforeEach(() => {
  cy.visit('/login');
});
4. Mock External APIs
Avoid relying on external services in your tests. Instead, mock API responses using cy.intercept:
cy.intercept('GET', '/api/data', { fixture: 'data.json' }).as('getData');Debugging Cypress Tests
A very important part during test creation is debugging which we talked about already in this article. Cypress makes debugging easy with tools like:
- Time Travel: Hover over commands in the Test Runner to see snapshots of your application at each step.
- Console Logs: Use
cy.logto output custom messages to the console. - Debugger: Add
debuggerstatements in your code to pause test execution.
Example:
cy.get('input[name="username"]').type('testuser').debug();Conclusion
Congratulations! You’ve successfully set up Cypress and written your first test. Cypress is an important and still evolving tool for web testing, offering simplicity and power in a single package. By following the steps and best practices outlined in this guide, you’re well on your way to mastering Cypress.
Remember, testing is an ongoing process. Keep exploring Cypress’s extensive documentation, and don’t hesitate to experiment with its advanced features like parallelization, CI/CD integration, and visual testing.
If you found this guide helpful, share it with your peers and leave a comment below with your thoughts or questions. Remember to stay tuned because the second article in the series is coming up.

