Postman API Automation Testing – How To Guide
API testing is increasingly taking over the testing world. During the test automation strategy design and test plan creation, we often think about different tools for manual API and automation testing. REST Assured or Cypress always get an advantage. But, when you think about it, we already completed the manual testing. We have all the tests prepared and stored in Postman collection. Why should we write all those again in a different tool? Wouldn’t it be easier to automate the collection execution? Can we harness Postman API automation testing for this? Read further for more details.
Step 1: Create a collection and environment
OK, this is self explanatory. You have to have all the tests in a collection. You need to add environment in Postman also. We will not go into details about the requests in the collection but it is highly advisable to add some tests in the scripts section. Otherwise, the automation part wouldn’t make any sense. Whether your tests are passing manually is not a relevant criterion to start automating. You can add the automation part even if the tests are not passing and work with developers on resolution of the problems. This complies with Shift Left strategy.
Step 2: Commit collection and environment in VCS
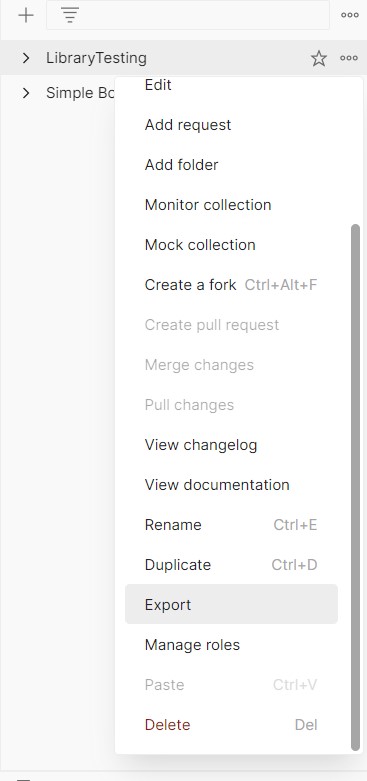
The idea of having automated tests for some software requires the repeated execution of those tests. In any other case, it is a waste of time and effort to create so called tests. To make sure that the test can be repeatedly executed, we need to add the tests and code in a version control of your choice. Popular choices are GitHub, Azure DevOps Repository, BitBucket, etc. In this way we ensure that the environment and collection for running the test are available for download by the next step. First we need to export the collection and environment from Postman. To do this, click on menu next to the name of the collection and select export. Do the same for the environment. Both files will be exported as JSON format.
Step 3: Add new Pipeline in CI/CD tool
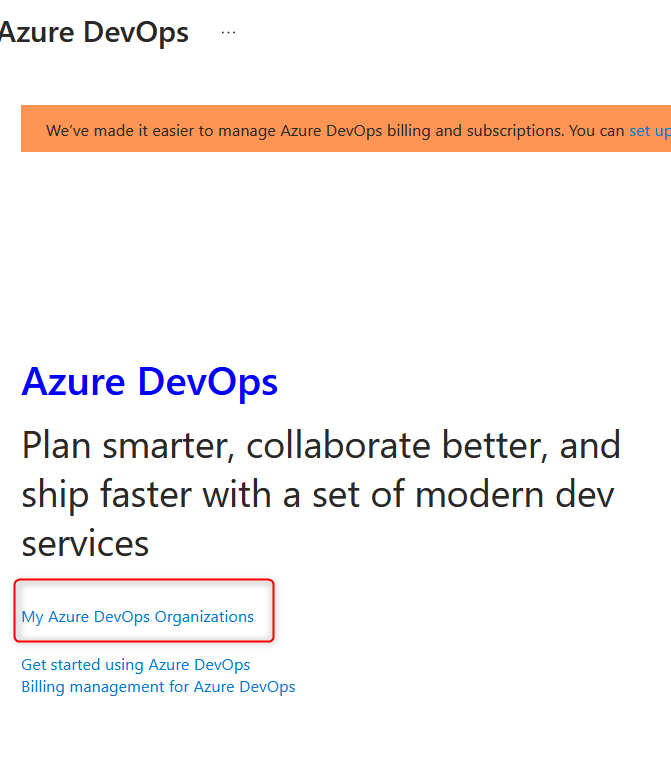
For the purpose of this article I will use Azure as an example although the general idea is the same. Only the steps might differ. Go to Azure website and login or create account if you don’t have one. Click on My Azure DevOps Organizations.
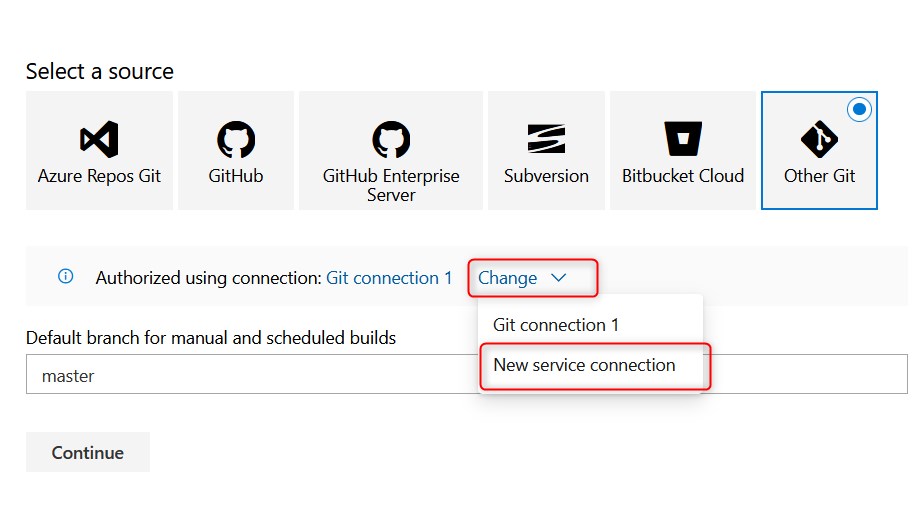
Create a new project or open an existing one in Azure Organizations. When the project opens, add new Pipeline and select your VCS or use the classic editor.

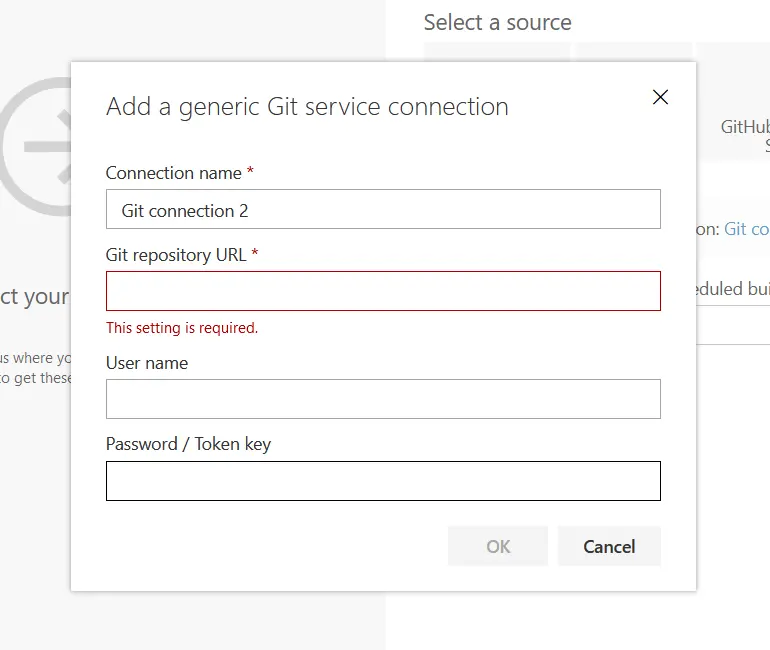
In the next step enter your VCS credentials and connect to the repository where you added collection and environment JSON files.
Step 4: Add Pipeline tasks
This part is quite straight forward and it will require adding only three tasks. When I click on plus icon in Agent section, it will open the marketplace on the right side. We can use search option to find the task we need.
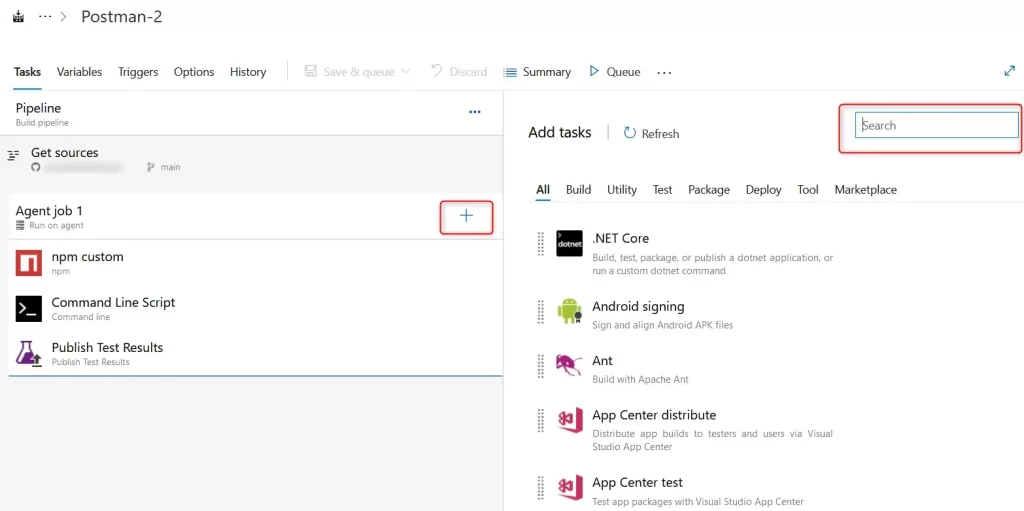
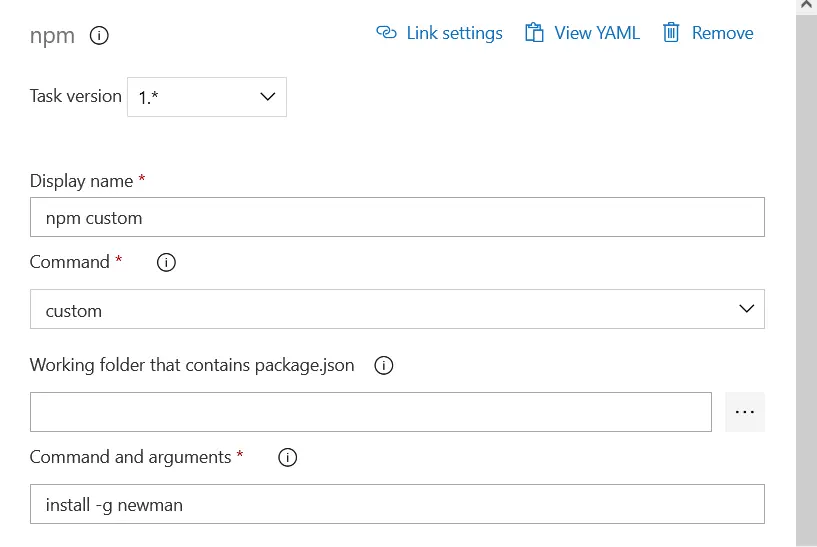
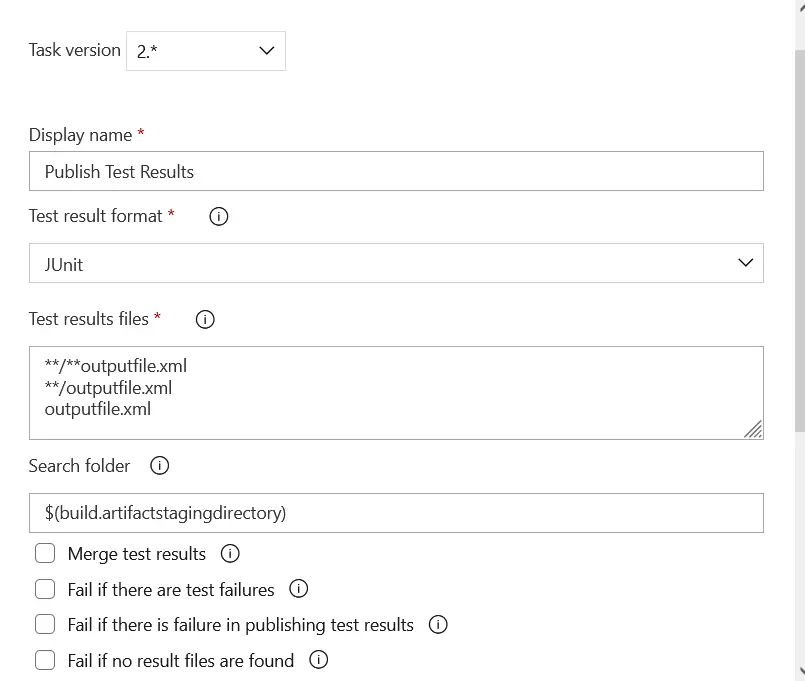
We need to add three tasks: npm, command line and publish test results. For npm task, we need to set custom command. This task will install Newman which is a Postman command line tool for API automation testing. We will use it to run the test from the pipeline.
Next in Command Line Script task we need to run the command for the test execution.
newman run “path to collection file” -e “path to environment file” -x -r –reporter-junit-export “path to output file” is the command for running the tests in Newman
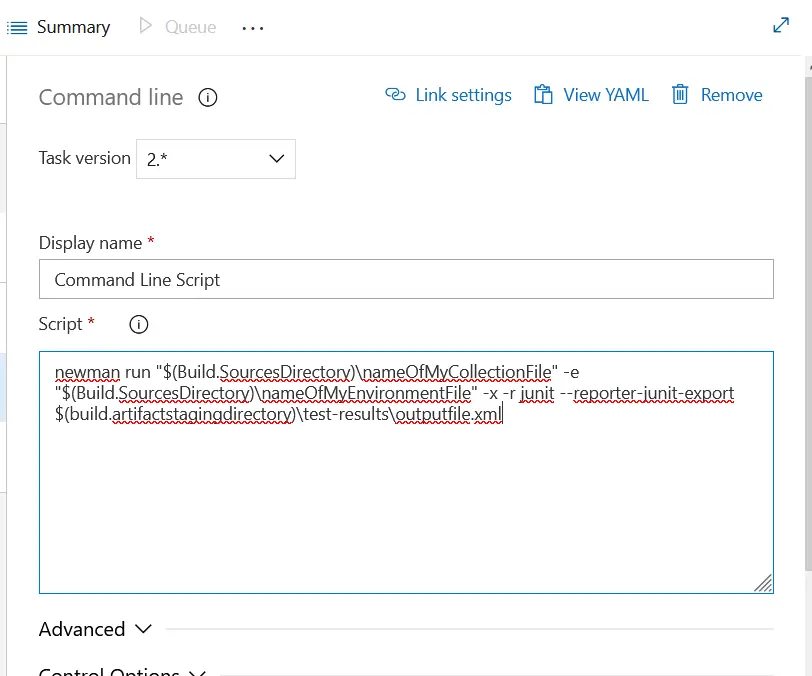
Optionally, we can put these paths to files in environment variables of the pipeline and simplify applying future changes. In the last part of the command we generate the output file which we will publish in the last task.
Step 4: Running the pipeline
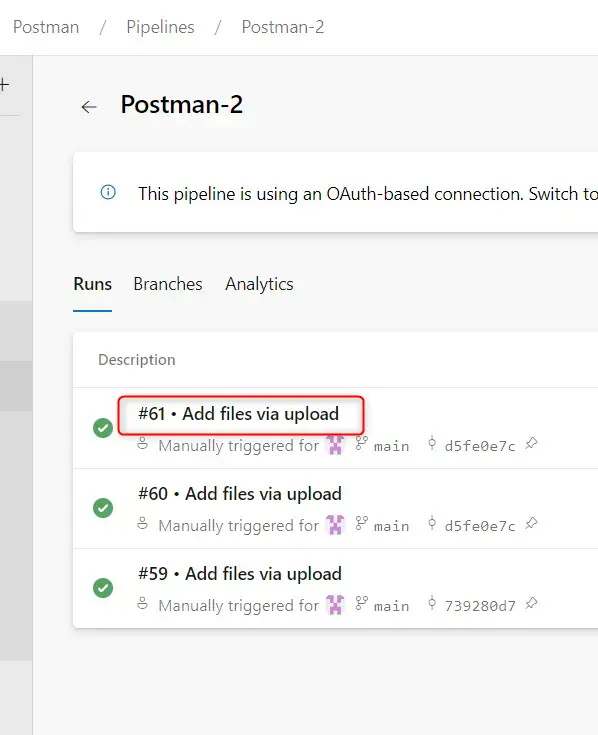
You can run the pipeline manually by clicking Save and Queue in toolbar. Alternatively, you can go to Triggers tab in Pipeline editor and schedule execution of your tests in CI.
As a side note, if you are creating this pipeline as a homework, you will need to create a request to Microsoft for hosted agent. You will know should you do that if you run the pipeline and you see errors saying “No hosted parallelism has been purchased or granted.”. You should click on the link in the error, fill in the form and submit. Microsoft will reply within few days.
Step 5: Results analysis
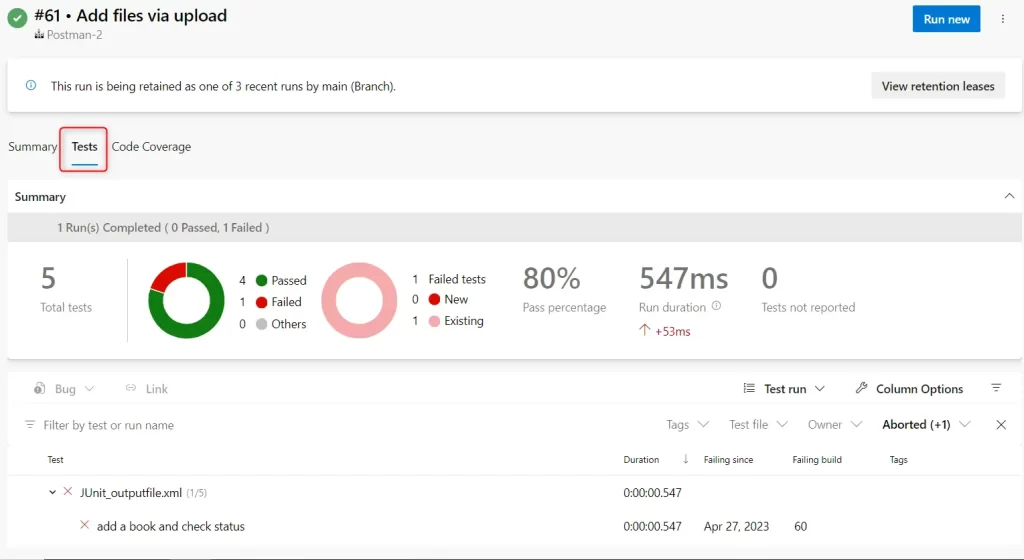
After the pipeline execution is completed, you can see the results in Tests tab.
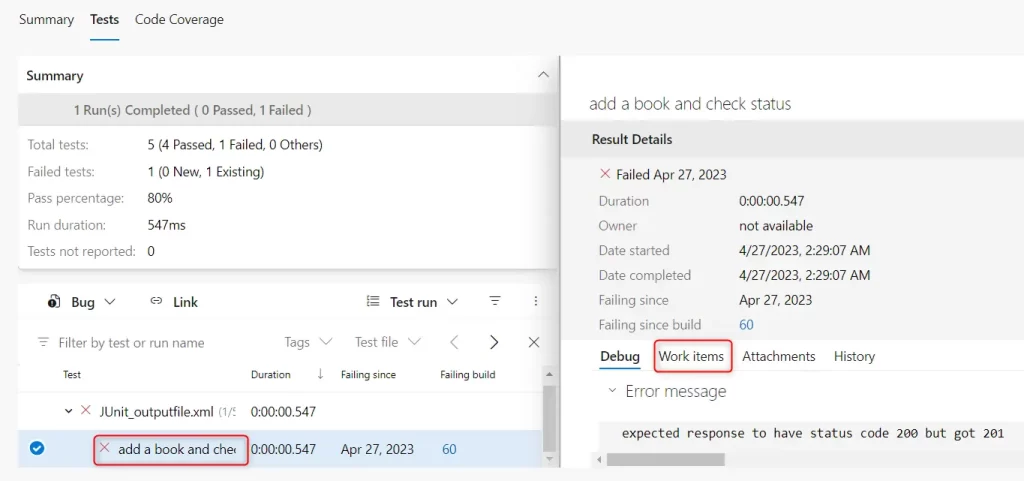
In the case of some failed tests you can see the error message and stack trace in Azure.
You can run them manually in Postman and check the results before creating any bug reports. In addition to this, many CI tools have integration with bug reporting tools so you might even be able to create bug reports directly from CI tool.
In my opinion this is a lot simpler and faster way of creating API test automation suite. Especially if you have already collection of requests in Postman created for manual testing.